Setting up a Button
General Setup
1. Long-Press (hold) the button or select the Edit menu item in EDIT mode to enter the button configuration screen
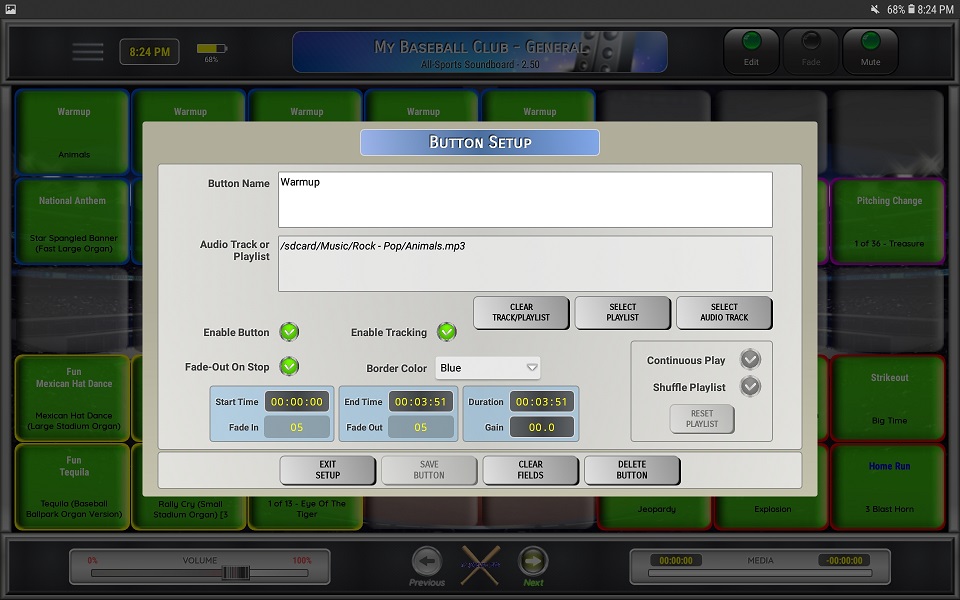
2. Enter a name for the button
⚬ This is the name you will see on the button on the main screen
⚬ The name field is limited to 200 characters
⚬ The title field supports the use of basic HTML styling so you can create custom titles
☆ If you need to use double-quotes in any tags, you must replace them with single-quotes
☆ Visit W3Schools - HTML for more information on how to use HTML tags
☆ Visit W3Schools - UTF Symbols for a list of supported symbols
☆ Visit Unicode - Emojis for a list of supported emojis
⚬ Below are a few examples of some supported HTML tags and symbols:
<b> BOLD
<strong> STRONG
<i> ITALIC
<u> UNDERLINE
<strike> STRIKE
<small> SMALL
<big> BIG
<font color='font color'> FONT COLOR
<p> NEW LINE
⛳ ⛳
🤠 🤠
3. Select an Audio File or Playlist
⚬ Click Select Audio Track to open the Select Audio Track screen (see below)
⚬ Click Select Playlist to open the Select Playlist screen (see below)
4. Enable Button
⚬ Click the checkbox to enable or disable the button
5. Enable Tracking
⚬ Click the checkbox to enable or disable tracking.
⚬ After the media has completed (manually stopped/faded or at the end of the track), the button background will change to yellow showing it's been used.
⚬ The tracked status for all buttons is maintained until manually reset.
⚬ See the Reset Tracking help section for details on how to reset tracking.
4. Enable Fade-Out on Manual Stop
⚬ Click the checkbox to enable or disable the auto fade-out option when manually stopping the audio (clicking the button or clicking "Stop" on the button menu)
☆ This feature will use the Fade On-Stop Duration value that is set in the Global Settings to fade-out the audio when you click the button to stop the audio or click stop on the button menu in EDIT mode.
6. Select a border color (none is the default)
7. Audio values (start/end time, volume/gain, duration) are read-only
8. Cancel/Save/Clear Values/Delete Button
⚬ Click Exit Setup to return to the main screen without making changes
⚬ Click Save Button to save the button and return to the main screen
⚬ Click Clear Fields to clear all of the input fields
⚬ Click Delete Button to delete the button and return to the main screen
Selecting an Audio Track (basic)
2. Click Select Audio Track to open the Select Audio Track screen
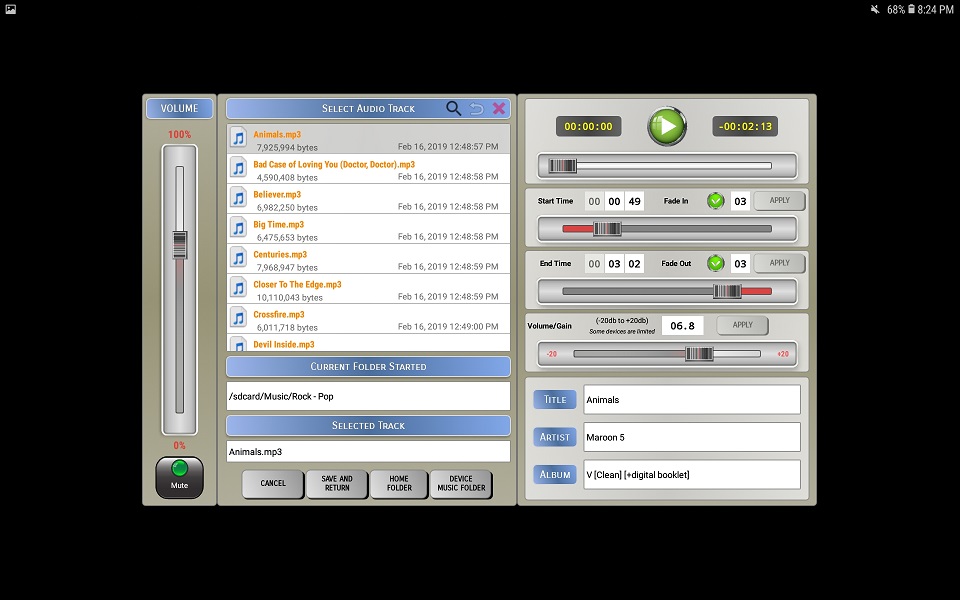
⚬ See the Selecting an Audio File help section for specifics on how to select a file, search for files and options for each track.
Selecting a Playlist
1. Click Select Playlist to open the Select Playlist screen
⚬ Only available in the paid version
2. Select a Playlist
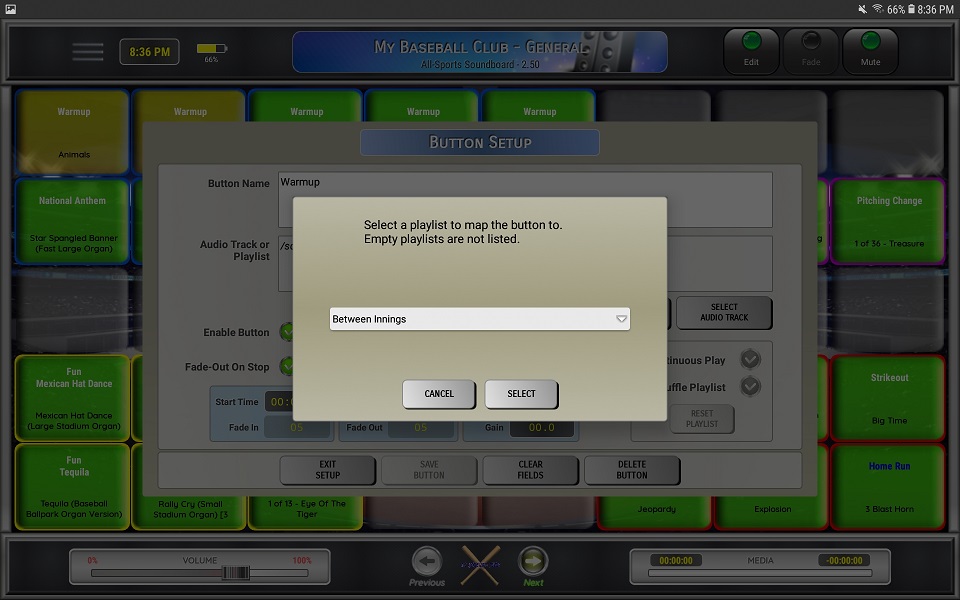
⚬ Use the dropdown list to select a playlist
☆ Empty playlists will NOT be displayed
3. Button Playlist Options
